
Figma 是一款专业的在线 UI 设计工具,它因为个人使用免费、在线跨平台、多人协作、蓬勃的 Figma Community 社区组织而广受欢迎。目前设计团队都在使用 Figma 进行 UI 设计交付。
> 能被 SaaS 化的终将被 SaaS 化
Figma 本身是 Web 服务,其客户端也是使用 Electron 进行的封装。所以它的插件系统是前端友好型,和日常前端开发没有什么太大的区别。
## 插件原理
Figma 的插件也采用了双线程的架构。UI 线程能获得完整 Web 的能力,但是无法直接操作 Figma;主线程则相反,可以通过 Figma API 对数据进行操作,但无完整的 Web 能力,仅有 JS 执行以及 Figma API 支持。两者通过 `postMessage` 进行通信。
根据[官方文章](
https://www.figma.com/blog/how-we-built-the-figma-plugin-system/)描述,通过 WebAssembly 版的 QuickJS 来实现主线程的沙箱执行,UI 线程则是通过 iframe 执行。

采用这种方案的原因主要是既想保证代码隔离,但是又希望能方便的操作 Figma 数据。
> 根据官博文章描述,之前也曾有尝试使用 Web 原生的沙盒 API Realms 来实现主线程的沙盒执行,但因为该 API 的一些安全漏洞还是回退回了 QuickJS 的实现。
了解了插件的原理之后,下面我就以帮助设计师同学快速插入占位图的插件 Placeholder 为例,带大家一步一步的了解如何进行 Figma 插件开发。
## 需求整理
在进行插件开发之前,我们捋一捋我们需要实现的功能。http://placeimg.com/ 是一个专门用来生成占位图的网站,我们将利用该网站提供的服务制作一个生成指定大小的占位图并插入到 Sketch 画板中的功能。插件会提供一个面板,可以让使用者输入尺寸、分类等可选项,同时提供插入按钮,点击后会在画板插入一张图片图层。
## 项目结构
|  |  |  |
| ------------------------------------------------- | ------------------------------------------------- | ------------------------------------------------- |
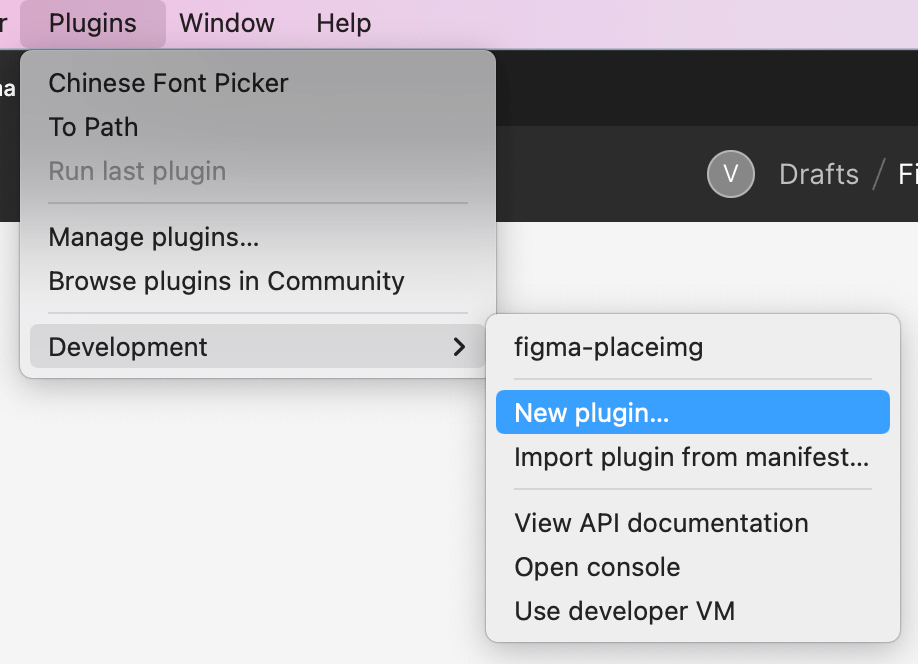
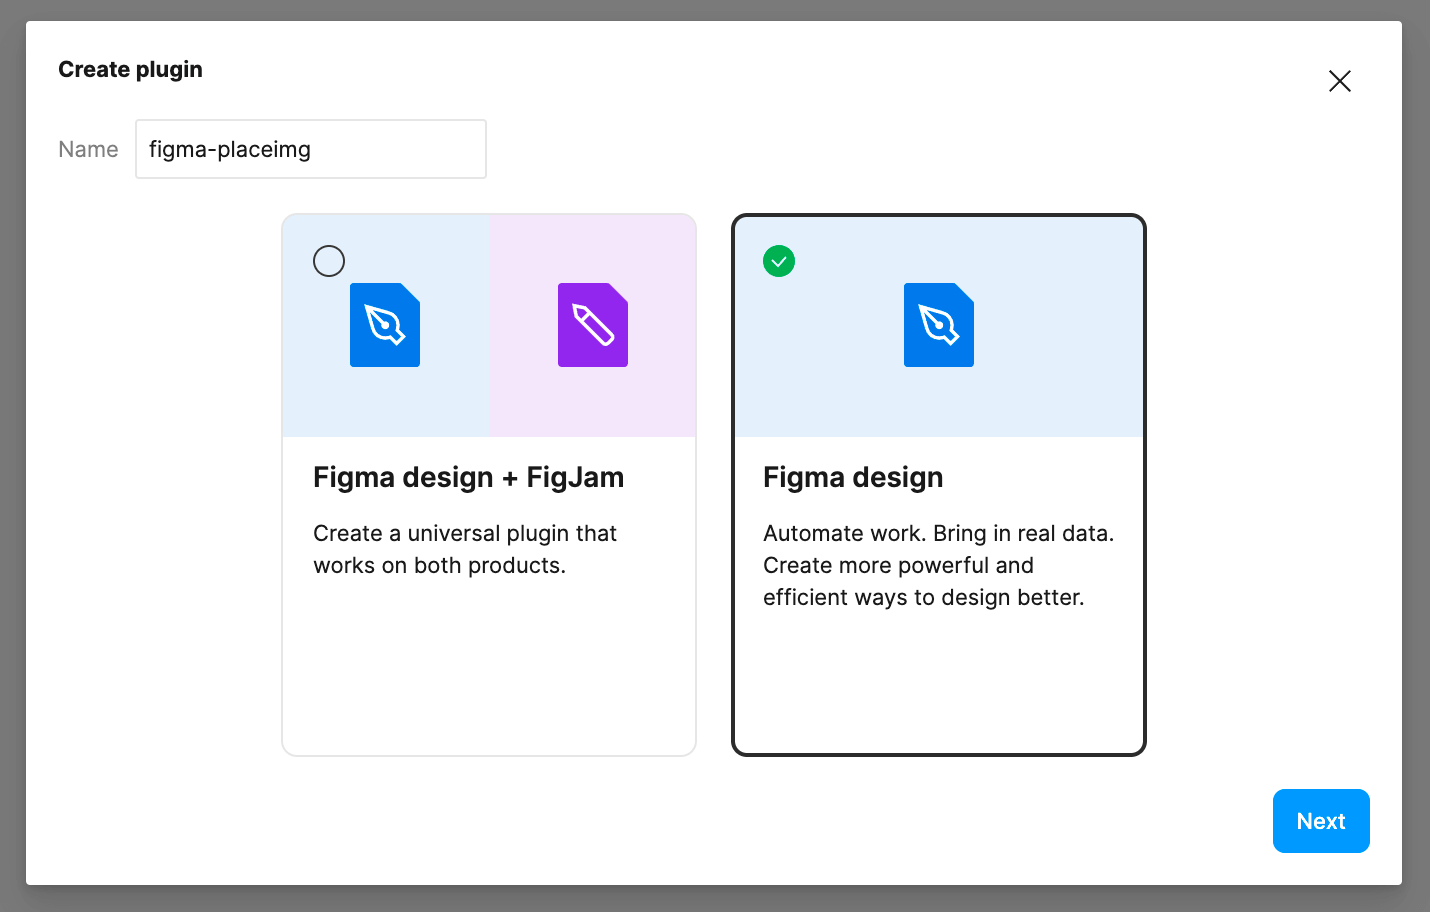
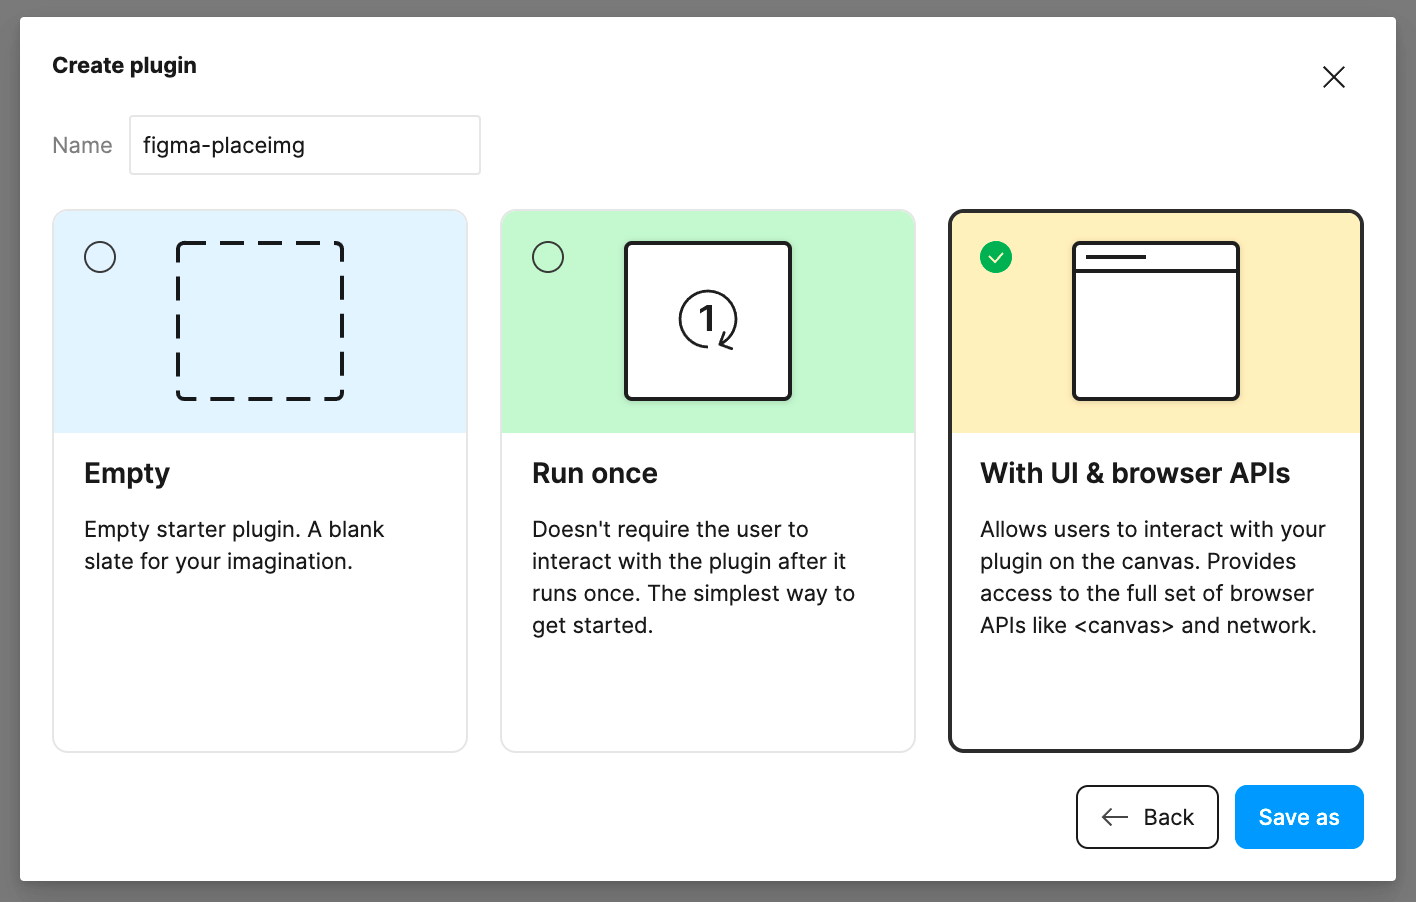
在 Figma 客户端中按照如上操作即可完成插件的初始化。除了默认的三个例子之外,官方也有一个示例插件的仓库,也可以参考。
https://github.com/figma/plugin-samples
Figma 插件默认推荐使用 TypeScript 开发,官方提供了完善的 TypeScript 类型支持。以默认的带 UI 的模板为例,初始化后进入文件夹 `npm i` 安装依赖后执行 `npm run build` 编译完成后点击插件即可看到效果。
```
.
├── README.md
├── code.js
├── code.ts
├── manifest.json
├── package-lock.json
├── package.json
├── tsconfig.json
└── ui.html
```
### manifest.json
可以看到整体的接口和大多数 JS 项目一样,其中 `manifest.json` 用来记录插件的信息。`manifest.json` 这个文件大家可以理解为是 Figma 插件的 `package.json` 文件。我们来看看默认生成的 `manifest.json`。
```json
{
"name": "figma-placeimg",
"id": "1117699210834344763",
"api": "1.0.0",
"main": "code.js",
"editorType": [
"figma"
],
"ui": "ui.html"
}
```
其中重点的是 main 和 ui 两个字段:
- main:指定插件的入口文件,该文件中的代码会运行在主进程中的沙箱里。
- ui: 指定插件的 UI 代码文件,该文件中的代码会运行在 iframe 中。实际上,UI 代码文件的内容会作为字符串传递给 figma 内置变量 `__html__`,在沙箱内可以通过 `figma.showUI(__html__)` 创建 iframe。
> 这里注意到是将**UI代码文件中的内容**作为**字符串**注入到主线程中,类似 ``。这就导致了我们无法直接引用插件中的其他资源,所有插件内依赖的资源都需要内嵌到最终的字符串中。
`ui` 字段也支持指定多个文件,当指定多个文件的时候会注入 `__uiFiles__` 对象来映射文件。
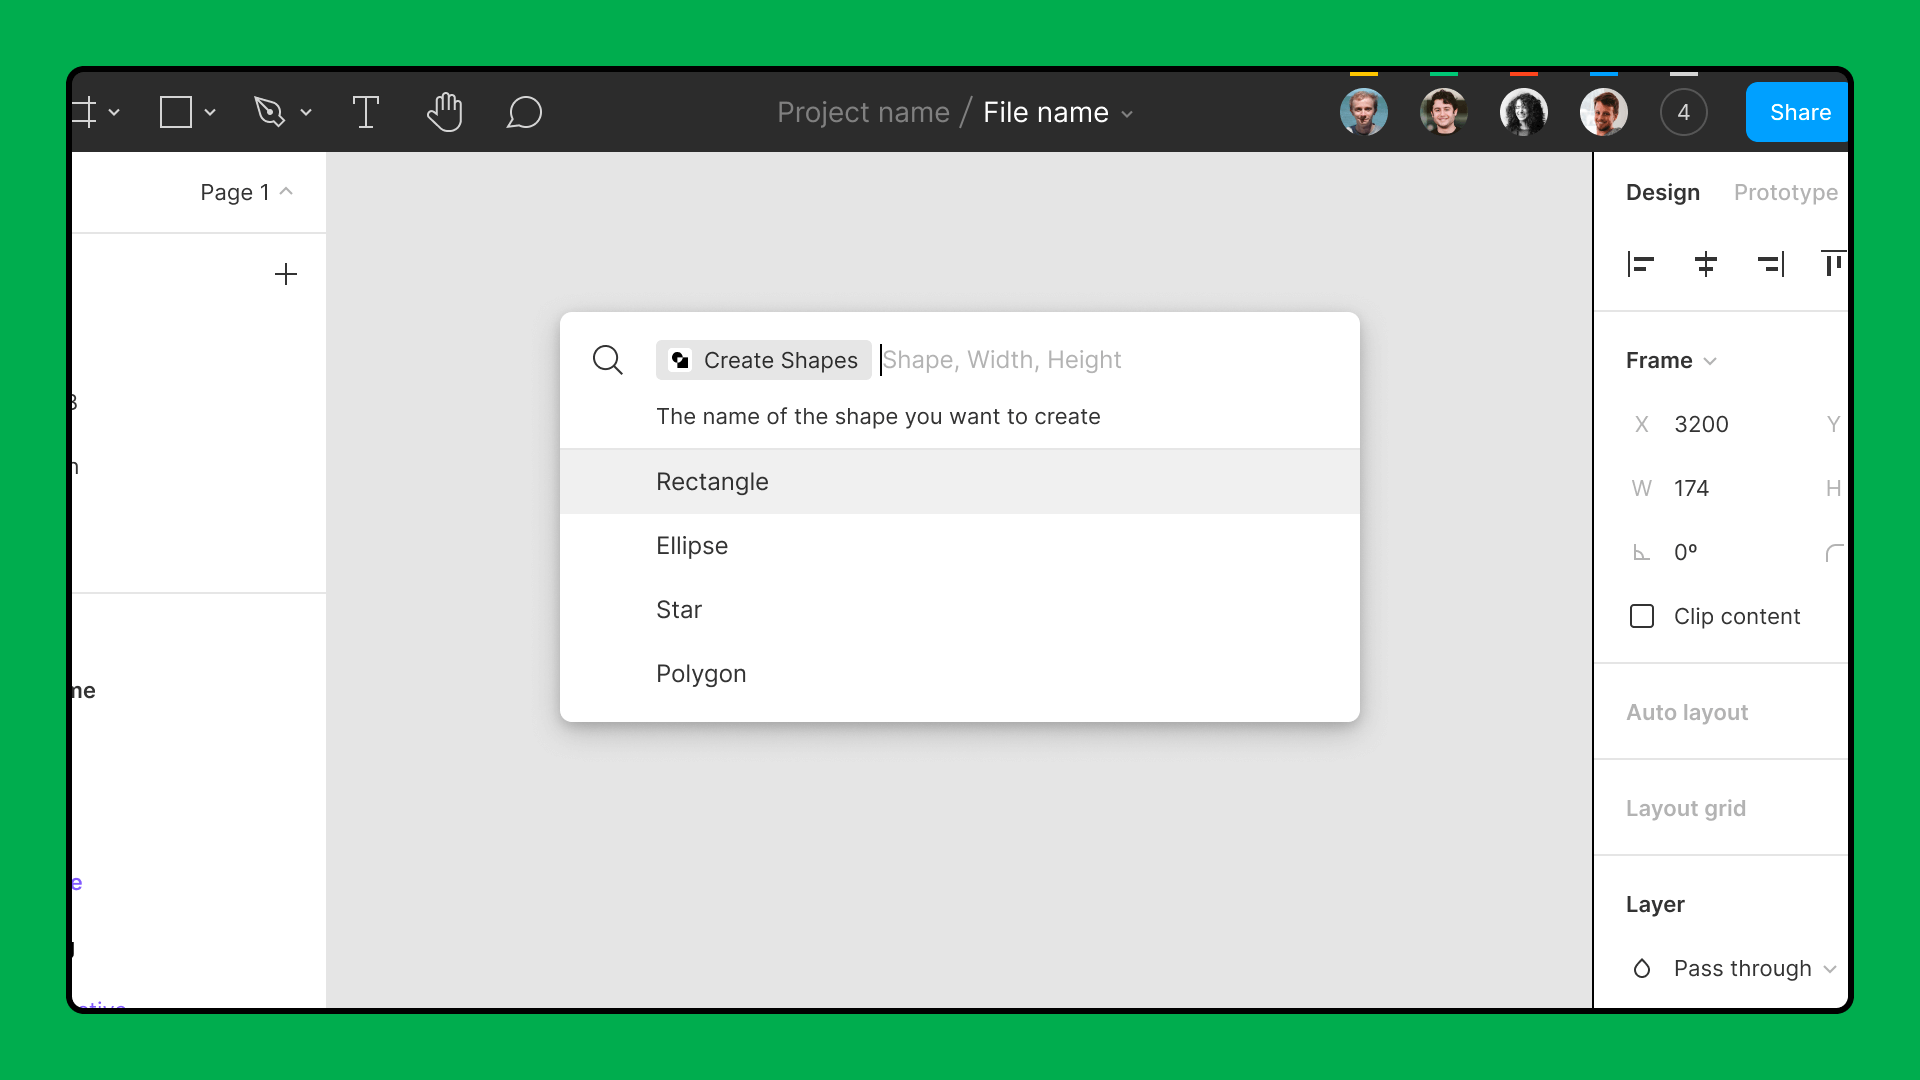
`manifest.json` 中还支持通过 `menu` 字段定义插件的菜单。如果不想写 UI 也可以通过parameters指定支持的指令,直接通过输入指令来操作也是可以的。更多的配置可以查看官方文档 [Plugin Manifest](https://www.figma.com/plugin-docs/manifest/)。
## 插件开发
一些基本原理了解清楚之后我们就可以进行插件的开发了。首先我们需要用户点击插件菜单之后打开一个面板,该面板可以配置尺寸、分类等基础信息。
```html
```
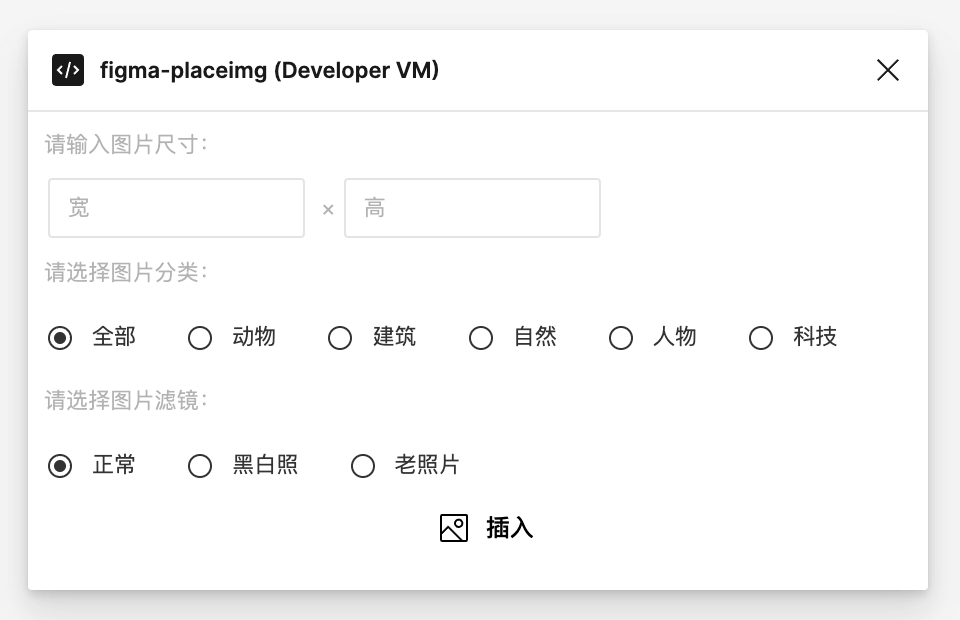
官方文档里有推荐 https://github.com/thomas-lowry/figma-plugin-ds 这个仓库,提供 Figma 的 UI 库组件,会让你的插件显的更加“原生”。
由于之前说过所有的资源都需要内嵌到 html 中,所以我使用了 CDN 地址的形式引入了样式文件。另外由于功能比较简单,这里也没有使用 React 等框架去进行开发。官方模板中有 React 模板可以参考 https://github.com/figma/plugin-samples/tree/master/webpack-react
### 获取图片
UI 完成之后接下来我们需要实现功能。我们需要将图片下载下来插入到 Figma 图层中。由于主线程没有网络能力,所以这部分工作需要在 UI 线程中完成,再通过 postMessage 传递回主线程中完成后续操作。具体的代码如下:
```html
```
由于 UI 线程是一个纯 Web 环境,当我们使用 `XMLHttpRequest` 或者 `fetch` 发送请求的时候,肯定会碰到跨域的问题。按照文档 https://www.figma.com/plugin-docs/making-network-requests/ 提供的解决办法,我们只能依靠服务端加层代理来解决。
当你的插件没有 UI 面板的时候,如何进行网络请求?按照文档所说,我们是可以设置 `figma.ui.show()` 的第二个参数,将其设置成 `visible: false` 的形式创建 `iframe` 获取数据。
```js
// code.ts
function fetch(url, options) {
const html = ``;
return new Promise(resolve => {
figma.ui.on('message', msg =>
msg.type === 'networkRequest' && resolve(msg.data)
);
figma.ui.show(html, { visible: false });
});
}
```
### 插入图片
由于只有主线程才能操作 Figma 数据,所以需要在 UI 线程 `postMessage` 传递数据到主线程中继续进行操作。
主线程中的步骤就比较简单了,使用 Figma API 创建好矩形并将图片填充即可完成图片的插入。
我们可以通过设置 `figma.currentPage.selection` 设置选中项,并使用 `figma.viewport.scrollAndZoomIntoView` 将刚插入的数据滚动到视野中。
```js
figma.ui.onmessage = msg => {
if (msg.type === 'insert') {
const rectNode = figma.createRectangle();
const image = figma.createImage(msg.bytes);
rectNode.name = 'Image';
rectNode.resize(msg.width, msg.height);
rectNode.fills = [{
imageHash: image.hash,
scaleMode: 'FILL',
scalingFactor: 0.5,
type: 'IMAGE'
}];
figma.currentPage.appendChild(rectNode);
figma.currentPage.selection = [rectNode];
figma.viewport.scrollAndZoomIntoView([rectNode]);
}
figma.closePlugin();
};
```
除了需要显示的调用 `figma.ui.show` 来展示 UI 之外,在执行完插件后需要显示的调用 `figma.closePlugin()` 告知 Figma 进行关闭插件操作。
### 优化插件
上面我们实现了配置宽高然后插入一张图片。但有时候我们会先插入一个矩形占位,之后才会将其替换成图片。所以我们可以优化下操作步骤,当选中到一个矩形的时候,自动获取到它的尺寸,然后点击插入后会直接插入到该矩形中。
```ts
// code.ts
function initSelectionState() {
if (figma.currentPage.selection.length === 1 && figma.currentPage.selection[0].type === 'RECTANGLE') {
const rectNode = figma.currentPage.selection[0];
figma.ui.postMessage({ type: 'update', width: rectNode.width, height: rectNode.height });
}
}
figma.on('selectionchange', initSelectionState);
initSelectionState();
```
通过在主线程中监听 `selectionchange` 事件,我们能实时获取到当前选中的元素。我们将尺寸信息发送到 UI 线程后让其填充到输入框中称为默认值。
```js
window.onmessage = function(e) {
if (e.data.pluginMessage.type === 'update') {
document.querySelector('input[name="width"]').value = e.data.pluginMessage.width;
document.querySelector('input[name="height"]').value = e.data.pluginMessage.height;
}
}
```
最后再插入的时候,我们也需要判断如果有选中矩形的话则优先使用选中的矩形,而不是新增矩形。
```js
let rectNode: RectangleNode;
if (figma.currentPage.selection.length === 1 && figma.currentPage.selection[0].type === 'RECTANGLE') {
rectNode = figma.currentPage.selection[0];
} else {
rectNode = figma.createRectangle();
}
// const rectNode = figma.createRectangle();
```
## 插件发布
最终我们的插件的主体功能就开发完毕了。下面我们就可以进行插件的发布了。我们可以直接通过插件管理中 Publish 操作进行发布。
| 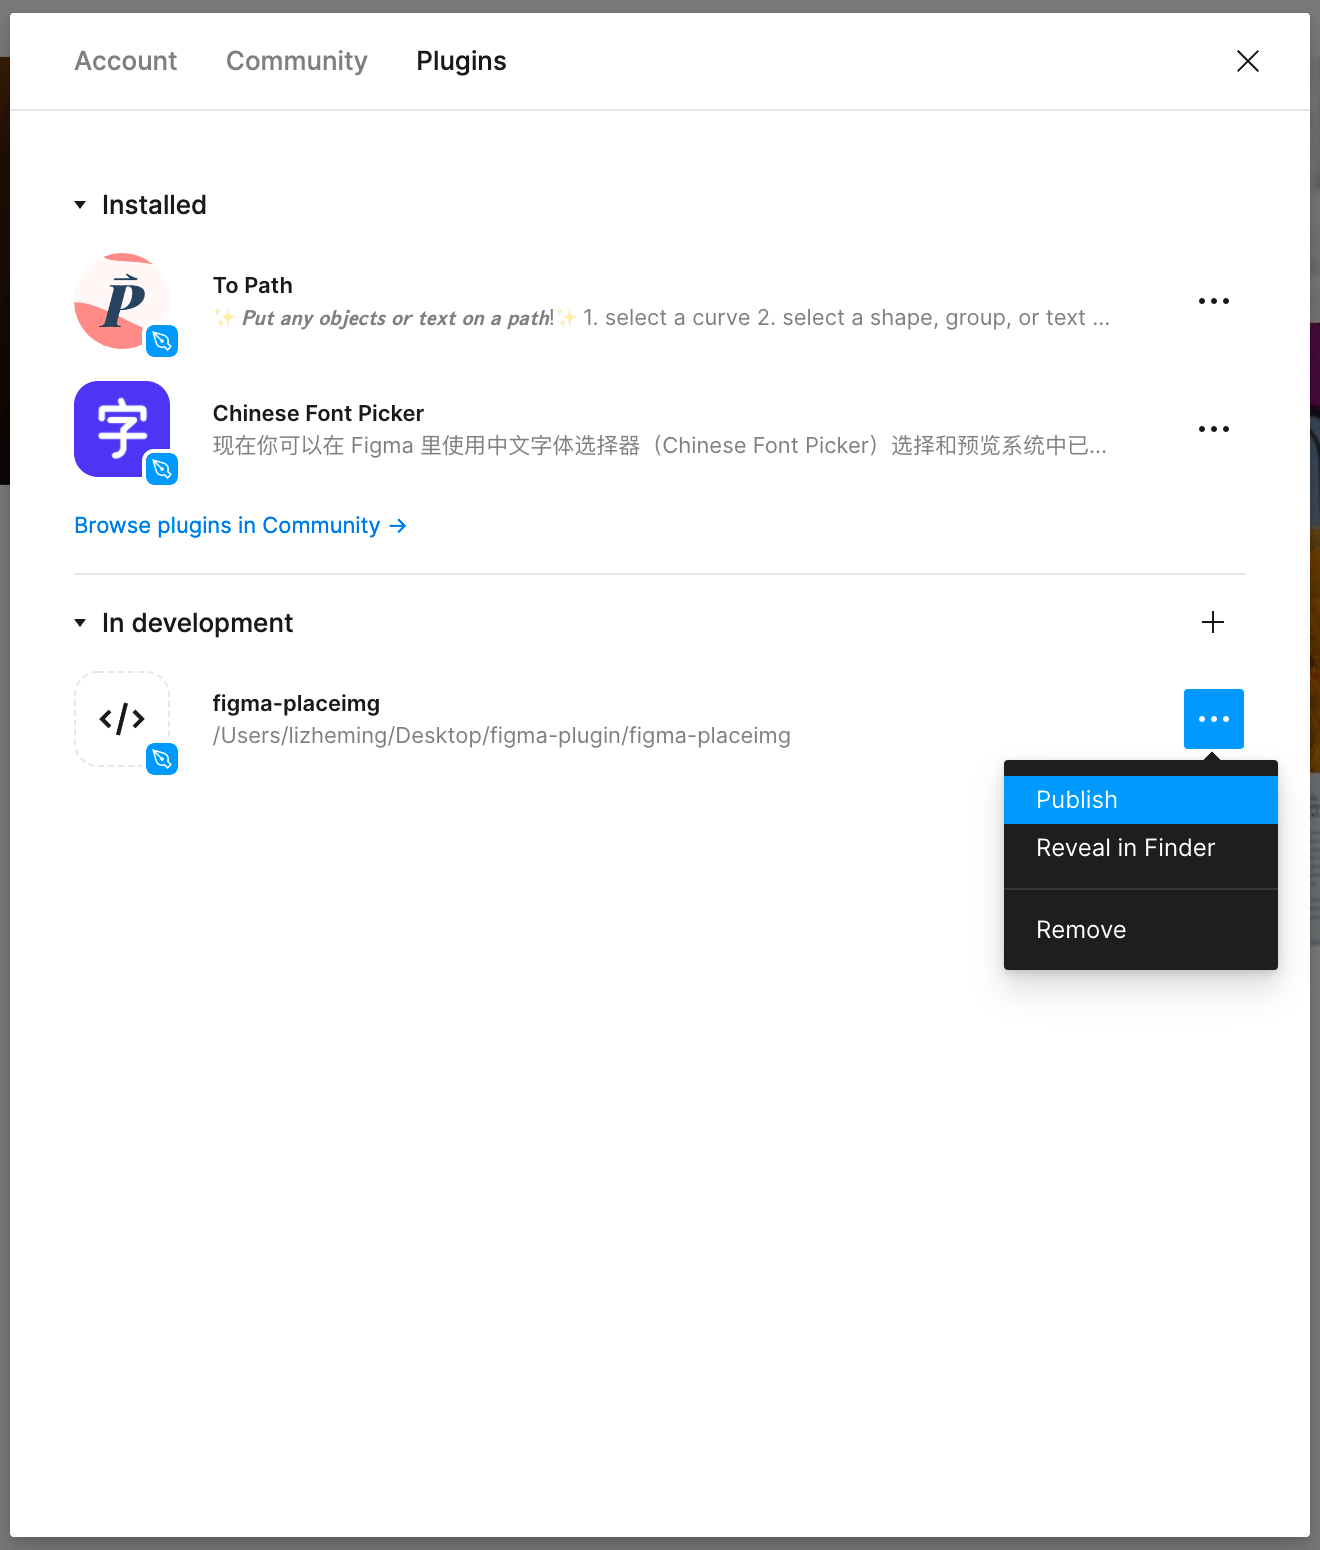 | 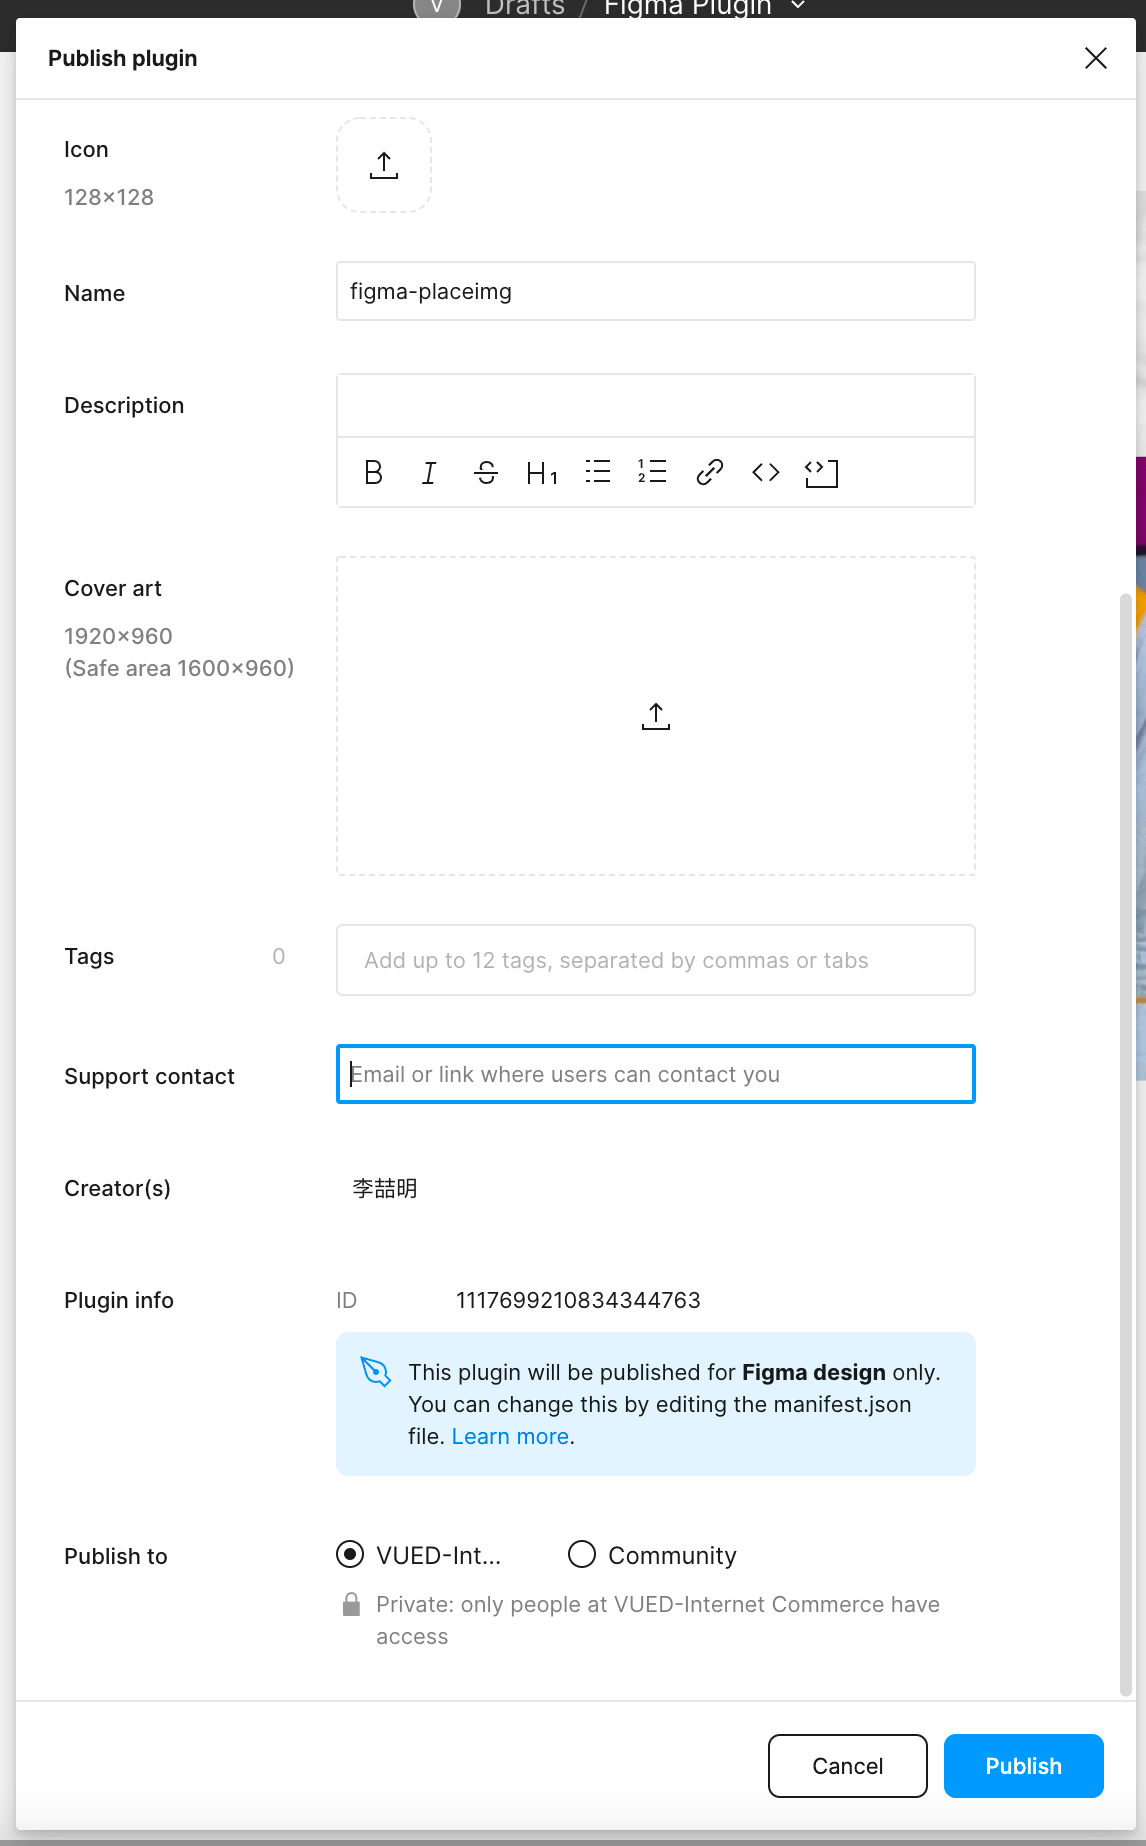 |
| - | - |
和 Chrome 插件有点类似,Figma 插件支持发布到社区,也支持发布到组织。支持发布到多个组织中。发布到组织不需要审核,但只有该组织的同学和文件可使用。发布到社区的需要由 Figma 官方审核。
## 插件调试
由于是 Web 技术向,所以 Figma 的插件调试非常简单。直接 Command + Shift + I 打开控制台即可。
不过比较麻烦的是热更新的支持不太好。之前页面资源需要编译到 html 问价中的方式也不太友好。所以有人就想到了** iframe 套娃**来解决 UI 的更新问题。

简单来说就是通过在 UI 线程中再嵌套一个在线页面,UI 线程作为主线程和新的 iframe 的消息中转。这样相当于将插件在线化,回到了纯 Web 开发模式了,热更新自然就没有什么问题了。
不过这仅能解决 UI 线程的热更新问题,主线程如果有变化还需要重新更新插件解决。基于上面的方案,其实我们能做的更“绝”一点。我们可以将主线程变成一个壳,具体的业务代码由 iframe 下发,通过这种方式来解决主线程的更新问题。
```js
// ui.html
parent.postMessage({ pluginMessage: { type: 'MAIN_CODE', code: 'console.log(figma)' } });
// code.ts
figma.ui.onmessage = (msg) => {
msg.type === 'MAIN_CODE' && eval(msg.code);
}
```
## 后记
通过示例讲述了如何开发一个 Figma 插件,包含了获取 Figma 数据信息,操作 Figma 文件等双向操作。基于以上简单操作我们可以完成更多有意义的事情帮助我们更好的开发。比如快速导出多尺寸图片、导出图标自动发布到 npm 等…
以上示例代码已发布到 GitHub 中,欢迎参考。
https://github.com/lizheming/figma-placeimg